

Ever wanted a good, good look at the insides of a 1950s radio, along with fantastic commentary on the internals and the purpose of various components? Then don’t miss [Adam Wilson]’s repair and restoration of a 1956 Philips 353A, a task made easier by a digitized copy of the service manual. [Adam] provides loads of great pictures, as well as tips on what it takes to bring vintage electronics back to life. What’s not to like?
Vintage electronics like this are often chock-full of components that deteriorate with age, so one doesn’t simply apply power to see if it still works as a first step. These devices need to be inspected and serviced before power is ever applied. Even then, powerup should be done with a current-controlled source that can be shut down if anything seems amiss.
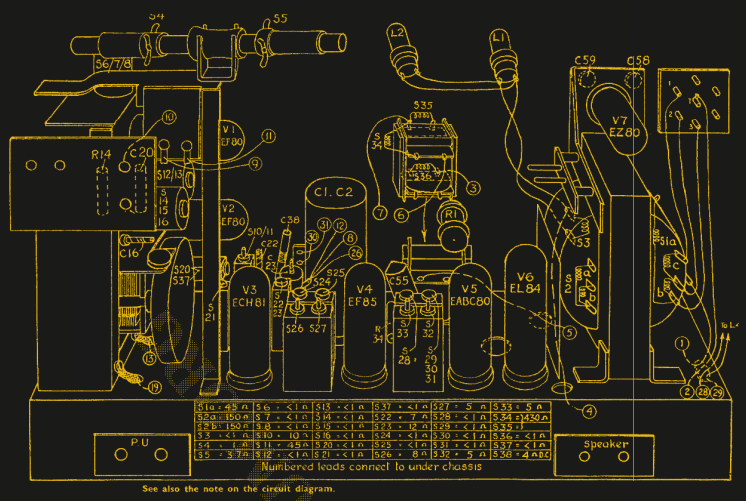
Thank goodness for high quality, digitized service manuals.
Devices like these largely predate printed circuit boards, so one can expect to see plenty of point-to-point soldering. Vacuum tubes did much of the hard work, so they are present instead of integrated circuits and transistors. Capacitors in the microfarads were much larger compared to their modern equivalents, and paper/wax capacitors (literally made from rolled-up paper covered in wax) handled capacitances in the nanofarad range instead of the little ceramic disk caps of today.
One thing that helped immensely is the previously-mentioned Philips 353A service manual, which includes not only a chassis and component layout, but even has servicing procedures such as cord replacement for the tuning dial. Back then, a tuning dial was an electromechanical assembly that used a winding of cord to rotat ..
Support the originator by clicking the read the rest link below.


